How To Image Upload With Progress Bar Angular 15
Websolutionstuff | Jun-21-2023 | Categories : Angular
As an Angular 15 developer, I understand the importance of incorporating image upload functionality with a progress bar into web applications. Providing users with a visual representation of the upload progress enhances the user experience and gives them confidence that their files are being successfully uploaded.
In this tutorial, I will guide you through the step-by-step process of implementing image upload functionality with a progress bar in Angular 15. Together, we will explore a practical code example and unravel the concepts involved.
By following this comprehensive tutorial, you will gain a solid understanding of how to handle image uploads in Angular 15 and display a progress bar to keep users informed about the upload status.
We will start by setting up a new Angular 15 project and proceed to create an image upload component. Throughout the tutorial, we will cover key aspects, including handling user input, tracking the upload progress, and displaying the progress using a progress bar.
Using the powerful features and libraries of Angular 15, we will create an intuitive and user-friendly image upload experience. Users will be able to select an image file, monitor the upload progress, and receive feedback on the success of the upload.
By the end of this tutorial, you will have the knowledge and skills necessary to incorporate image upload functionality with a progress bar into your own Angular 15 applications. You will be able to provide a seamless and interactive image upload experience, ensuring a positive user interaction and enhancing the overall usability of your web applications.
So, let's embark on this journey together and learn how to implement image upload functionality with a progress bar in Angular 15. Get ready to elevate your web applications and provide a modern and engaging image upload experience for your users.
Start by creating a new Angular app using the following command.
ng new my-new-app
This step guides you on how to install Bootstrap 4 in your Angular app using npm. Additionally, you need to add the Bootstrap CSS file to the angular.json file.
npm install bootstrap
Now you need to add bootstrap css in the angular.json file.
angular.json
....
"styles": [
          "node_modules/bootstrap/dist/css/bootstrap.min.css",
          "src/styles.css"
        ],
....
This step involves creating a service called ImageUploadService to handle the image upload functionality. The service utilizes the HttpClient module to make HTTP requests to the server.
The imageUpload method sends a POST request with the image file and progress tracking enabled. The errorMgmt method handles any errors that occur during the upload process.
ng generate service image-upload
src/app/image-upload.service.ts
import { Injectable } from '@angular/core';
import { Observable, throwError } from 'rxjs';
import { catchError } from 'rxjs/operators';
import { HttpErrorResponse, HttpClient } from '@angular/common/http';

@Injectable({
  providedIn: 'root'
})
export class ImageUploadService {

  constructor(private http: HttpClient) { }

  imageUpload(name: string, profileImage: File): Observable {

    var formData: any = new FormData();
    formData.append("name", name);
    formData.append("image", profileImage);

    return this.http.post('http://localhost:8000/upload.php', formData, {
      reportProgress: true,
      observe: 'events'
    }).pipe(
      catchError(this.errorMgmt)
    )
  }

  errorMgmt(error: HttpErrorResponse) {
    let errorMessage = '';
    if (error.error instanceof ErrorEvent) {
      // Get client-side error
      errorMessage = error.error.message;
    } else {
      // Get server-side error
      errorMessage = `Error Code: ${error.status}\nMessage: ${error.message}`;
      console.log(error);
    }
    console.log(errorMessage);
    return throwError(errorMessage);
  }
}
In this step, you import the necessary modules (HttpClientModule and ReactiveFormsModule) and the ImageUploadService into the AppModule.
src/app/app.module.ts
import { NgModule } from '@angular/core';
import { BrowserModule } from '@angular/platform-browser';

import { AppComponent } from './app.component';
import { HttpClientModule } from '@angular/common/http';
import { ReactiveFormsModule } from '@angular/forms';

@NgModule({
  declarations: [
    AppComponent
  ],
  imports: [
    BrowserModule,
    HttpClientModule,
    ReactiveFormsModule
  ],
  providers: [],
  bootstrap: [AppComponent]
})
export class AppModule { }
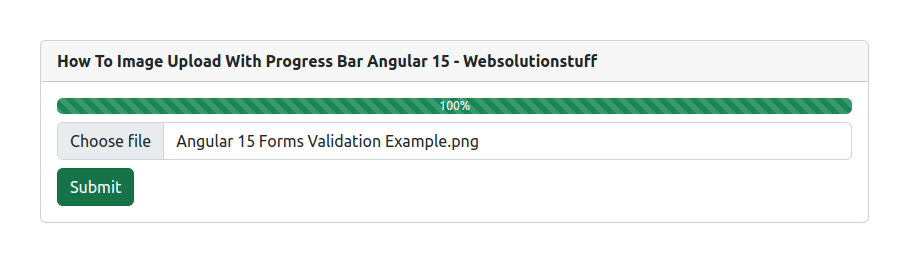
Here, you update the app.component.html file to include a form with file input and a progress bar.
src/app/app.component.html
<div class="row">
<div class="col-md-8">
<div class="container mt-5">
	<div class="card">
		<div class="card-header">
			<strong>How To Image Upload With Progress Bar Angular 15 - Websolutionstuff</strong>
		</div>
		<div class="card-body">
			<form [formGroup]="form" (ngSubmit)="submitImage()">
				<!-- Progress Bar -->
				<div class="progress form-group mb-2" *ngIf="progress > 0">
					<div class="progress-bar progress-bar-striped bg-success" role="progressbar" [style.width.%]="progress">{{progress}}%
					</div>
				</div>

				<div class="form-group">
					<input formControlName="file" type="file" class="form-control" (change)="uploadFile($event)">
				</div>

				<div class="form-group">
					<button class="btn btn-success btn-block mt-2">Submit</button>
				</div>
			</form>
		</div>
	</div>
</div>
</div>
</div>
In the app.component.ts file, you define the form, progress variable, and necessary methods. The uploadFile method updates the form with the selected image file.
The submitImage method calls the imageUpload method from the service and subscribes to the progress events. Depending on the event type, progress updates and completion messages are logged.
src/app/app.component.ts
import { Component } from '@angular/core';
import { FormBuilder, FormGroup } from "@angular/forms";
import { ImageUploadService } from "./image-upload.service";
import { HttpEvent, HttpEventType } from '@angular/common/http';

@Component({
  selector: 'app-root',
  templateUrl: './app.component.html',
  styleUrls: ['./app.component.css']
})
export class AppComponent {
  form: FormGroup;
  progress: number = 0;

  constructor(
    public fb: FormBuilder,
    public imageUploadService: ImageUploadService
  ) {
    this.form = this.fb.group({
      name: [''],
      avatar: [null]
    })
  }

  ngOnInit() { }

  uploadFile(event:any) {
    const file = event.target.files ? event.target.files[0] : '';
    this.form.patchValue({
      avatar: file
    });
    this.form.get('avatar')?.updateValueAndValidity()
  }

  submitImage() {
    this.imageUploadService.imageUpload(
      this.form.value.name,
      this.form.value.avatar
    ).subscribe((event: HttpEvent<any>) => {
      switch (event.type) {
        case HttpEventType.Sent:
          console.log('Request has been made!');
          break;
        case HttpEventType.ResponseHeader:
          console.log('Response header has been received!');
          break;
        case HttpEventType.UploadProgress:
          var eventTotal = event.total ? event.total : 0;
          this.progress = Math.round(event.loaded / eventTotal * 100);
          console.log(`Uploaded! ${this.progress}%`);
          break;
        case HttpEventType.Response:
          console.log('Image Upload Successfully!', event.body);
          setTimeout(() => {
            this.progress = 0;
          }, 2000);

      }
    })
  }
}
In this step, we will create a PHP file called upload.php that takes care of the server-side logic for uploading images. This file will be responsible for receiving the image file from the client and moving it to the desired location on the server. Additionally, it will provide a JSON response back to the client, indicating whether the upload was successful or not.
Now that we have successfully implemented the image upload functionality, including the preview feature, in our Angular application, it's time to create an API file using PHP. This API file, upload.php, will handle the actual process of receiving the uploaded image file and storing it in a specific folder called "upload".
By creating the upload.php file, we will have a centralized component that handles the communication between the client-side Angular application and the server-side storage. This ensures a smooth and efficient process for uploading and storing images in our application
upload.php
<?php

    header("Access-Control-Allow-Origin: *");

    header("Access-Control-Allow-Methods: PUT, GET, POST");

    header("Access-Control-Allow-Headers: Origin, X-Requested-With, Content-Type, Accept");

    $target_dir = "upload/";
    $target_file = $target_dir . basename($_FILES["image"]["name"]);
    $uploadOk = 1;
    $imageFileType = strtolower(pathinfo($target_file,PATHINFO_EXTENSION));

    if (move_uploaded_file($_FILES["image"]["tmp_name"], $target_file)) {
        $t = "The file ". htmlspecialchars( basename( $_FILES["fileToUpload"]["name"])). " has been uploaded.";
    } else {
        $t = "Sorry, there was an error uploading your file.";
    }

    header('Content-Type: application/json; charset=utf-8');
    echo json_encode([$t]);
    exit;

?>
Start the Angular development server using the ng serve command and open the app in your browser. Try selecting an image file using the file input field. The selected image should be displayed in the preview area.
ng serve
To run the PHP file on a different port, you can use a PHP development server. Open your terminal or command prompt, navigate to the directory where the upload.php file is located, and run the following command.
php -S localhost:8000
In this tutorial, we learned how to implement image upload with a progress bar in Angular 15. We covered the step-by-step process of creating an Angular app, importing the required modules, and implementing the necessary logic in the component.
We also explored how to display a progress bar to track the upload progress and handle the API response. With this knowledge, you can now enhance your Angular applications by enabling users to upload images with a visually appealing progress bar.
You might also like:
- Read Also: How to Upgrade from Angular 14 to Angular 15
- Read Also: Laravel 9 Ajax File Upload With Progress Bar
- Read Also: How To File Upload With Progress Bar In PHP
- Read Also: Laravel 9 Paypal Payment Gateway Integration
Recommended Post
Featured Post

Laravel Datatables Example
In this example, I will show you how to implement/install data tables in laravel. Datatables provides users with many fu...
May-16-2020

jQuery Show and Hide Effects E...
Hello friends, in this tutorial, we will see jQuery show and hide effects example. jQuery show method and jQuery...
Jan-21-2022

Laravel 9 Form Collective Exam...
In this article, we will see laravel 9 form collective example. Here, we will learn how to use collective form and...
Jan-20-2023

Laravel 9 Paypal Payment Gatew...
In this article, we will see laravel 9 paypal payment gateway integration. Here, we will learn how to integrate the...
Jan-17-2023