How To File Upload In Angular 15 Example
Websolutionstuff | Jun-19-2023 | Categories : Angular
As an Angular 15 developer, I understand the significance of incorporating file upload functionality into web applications. It allows users to easily share and manage various types of files, such as images, documents, and more.
In this tutorial, I will guide you through the step-by-step process of implementing file upload functionality in Angular 15. Together, we will explore a practical code example and unravel the concepts involved.
By following this comprehensive tutorial, you will gain a solid understanding of how to handle file uploads in Angular 15. We will start by setting up a new Angular 15 project and proceed to create a file upload component.
Throughout the tutorial, we will cover key aspects, including handling user input, implementing file upload logic, and successfully transmitting the files to a server. Leveraging the powerful features and libraries of Angular, we will create a seamless and user-friendly file upload experience.
By the end of this tutorial, you will have the knowledge and skills necessary to incorporate file upload functionality into your own Angular 15 applications. You will be able to build robust file upload forms, handle user-selected files, and transmit them to a backend server with confidence.
Empower your users to effortlessly share files, enhance collaboration, and streamline workflows in your Angular 15 applications.
So, let's embark on this journey together and discover the process of implementing file upload functionality in Angular 15. Get ready to unlock the power of file uploads and elevate your web applications to new heights.
Prerequisites:
Before we begin, make sure you have Angular 15 installed on your development machine. You can install Angular CLI globally by running the following command.
npm install -g @angular/cli@15
Start by creating a new Angular 15 project using the Angular CLI.
ng new file-upload-app
In this step, we will import the necessary modules, HttpClientModule, FormsModule, and ReactiveFormsModule, into our app.module.ts file. These modules play a crucial role in enabling essential features like handling HTTP requests and supporting reactive forms in our Angular 15 application.
src/app/app.module.ts
import { NgModule } from '@angular/core';
import { BrowserModule } from '@angular/platform-browser';

import { AppComponent } from './app.component';
import { FormsModule, ReactiveFormsModule } from '@angular/forms';

import { HttpClientModule } from '@angular/common/http';

@NgModule({
  declarations: [
    AppComponent
  ],
  imports: [
    BrowserModule,
    FormsModule,
    ReactiveFormsModule,
    HttpClientModule
  ],
  providers: [],
  bootstrap: [AppComponent]
})
export class AppModule { }
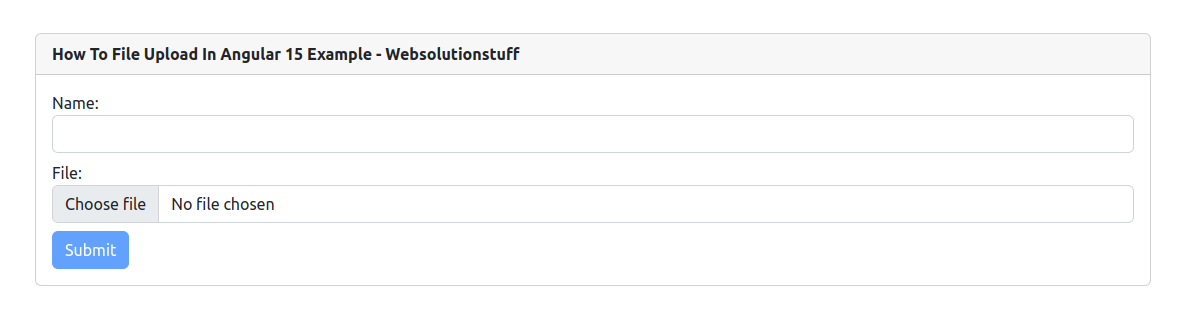
Open the app.component.html file and add the following HTML markup to create a file input element and a button for submitting the file.
<div class="container mt-5">
	<div class="card">
		<div class="card-header">
			<strong>How To File Upload In Angular 15 Example - Websolutionstuff</strong>
		</div>
		<div class="card-body">
			<form [formGroup]="myForm" (ngSubmit)="submit()">
				<div class="form-group">
					<label for="name">Name:</label>
					<input formControlName="name" id="name" type="text" class="form-control">
					<div *ngIf="f['name'].touched && f['name'].invalid" class="alert alert-danger mt-1">
						<div *ngIf="f['name'].errors && f['name'].errors['required']">Name is required.</div>
						<div *ngIf="f['name'].errors && f['name'].errors['minlength']">Name should be 3 character.</div>
					</div>
				</div>

				<div class="form-group mt-2">
					<label for="file">File:</label>
					<input formControlName="file" id="file" type="file" class="form-control" (change)="onFileChange($event)">
					<div *ngIf="f['file'].touched && f['file'].invalid" class="alert alert-danger mt-1">
						<div *ngIf="f['file'].errors && f['file'].errors['required']">File is required.</div>
					</div>
				</div>
				<button class="btn btn-primary mt-2" [disabled]="myForm.invalid" type="submit">Submit</button>
			</form>
		</div>
	</div>
</div>
In the app.component.ts file, implement the logic to handle file selection and upload.
src/app/app.component.ts
import { Component } from '@angular/core';
import { HttpClient } from '@angular/common/http';
import { FormGroup, FormControl, Validators} from '@angular/forms';

@Component({
  selector: 'app-root',
  templateUrl: './app.component.html',
  styleUrls: ['./app.component.css']
})
export class AppComponent {
/*------------------------------------------
  --------------------------------------------
  Declare Form
  --------------------------------------------
  --------------------------------------------*/
  myForm = new FormGroup({
    name: new FormControl('', [Validators.required, Validators.minLength(3)]),
    file: new FormControl('', [Validators.required]),
    fileSource: new FormControl('', [Validators.required])
  });

  /*------------------------------------------
  --------------------------------------------
  Created constructor
  --------------------------------------------
  --------------------------------------------*/
  constructor(private http: HttpClient) { }

  /**
   * Write code on Method
   *
   * @return response()
   */
  get f(){
    return this.myForm.controls;
  }

  /**
   * Write code on Method
   *
   * @return response()
   */
  onFileChange(event:any) {

    if (event.target.files.length > 0) {
      const file = event.target.files[0];
      this.myForm.patchValue({
        fileSource: file
      });
    }
  }

  /**
   * Write code on Method
   *
   * @return response()
   */
  submit(){
    const formData = new FormData();
    // formData.append('file', this.myForm.get('fileSource')?.value);

    this.http.post('http://localhost:8000/upload.php', formData)
      .subscribe(res => {
        console.log(res);
        alert('Uploaded Successfully.');
      })
  }
}
Now that we have completed the necessary setup, we are ready to run our file upload example. In order to handle the server-side logic and process the uploaded files, we need to create an API file using PHP. Specifically, we will create an update.php file that will reside in an "upload" folder on our server.
To create the upload.php file, follow the steps below:
-
Create a new file and save it as an
upload.php. -
Create a folder named "upload" in the same directory as the
upload.phpfile. This folder will serve as the destination for the uploaded files. -
Open the
upload.phpfile and start by including the necessary PHP code to handle the file upload process.
<?php

    header("Access-Control-Allow-Origin: *");
    header("Access-Control-Allow-Methods: PUT, GET, POST");
    header("Access-Control-Allow-Headers: Origin, X-Requested-With, Content-Type, Accept");

    $folderPath = "upload/";

    $file_tmp = $_FILES['file']['tmp_name'];
    $file_ext = strtolower(end(explode('.',$_FILES['file']['name'])));
    $file = $folderPath . uniqid() . '.'.$file_ext;
    move_uploaded_file($file_tmp, $file);

?>
To run the PHP file on a different port, you can use a PHP development server.
To see our file upload example in action, let's start the Angular development server using the ng serve command. Open your terminal or command prompt, navigate to the root directory of your Angular application, and run the following command.
ng serve
Once the server is up and running, open your web browser and navigate to the provided localhost URL. You should now see your Angular application running.
To run the PHP file on a different port, you can use a PHP development server. Open your terminal or command prompt, navigate to the directory where the upload.php file is located, and run the following command.
php -S localhost:8000
Now, in your Angular application, make sure to update the API URL in your image upload component to point to the correct port and file.
In this tutorial, we have learned how to implement file upload functionality in Angular 15. By following the step-by-step guide and reviewing the code example, you now have the knowledge and tools to enable file uploads in your Angular applications. Feel free to enhance the implementation by integrating server-side logic to handle the uploaded files.
You might also like:
- Read Also: How To Image Upload With Preview In Angular 15
- Read Also: How To File Upload In Laravel 10 Example
- Read Also: How To File Upload With Progress Bar In PHP
- Read Also: File Upload With Progress Bar In Angular 13
Recommended Post
Featured Post

Bootstrap DateTimePicker Examp...
In this post i will show you how to implement bootstrap datetimepicker with example, bootstrap 4 datetimepicke...
Apr-02-2021

Laravel 9 Datatables Filter wi...
In this article, we will see laravel 9 datatables filter with dropdown. Here we will add datatables...
Mar-12-2022

How To Check Email Already Exi...
In this article, we will show how to check whether the email already exists or not in laravel. Also, we will check...
Aug-07-2020

Laravel tips DB Models and Elo...
Welcome back to the third installment of our series on Laravel tips for database models and Eloquent. If you've been...
Oct-16-2023