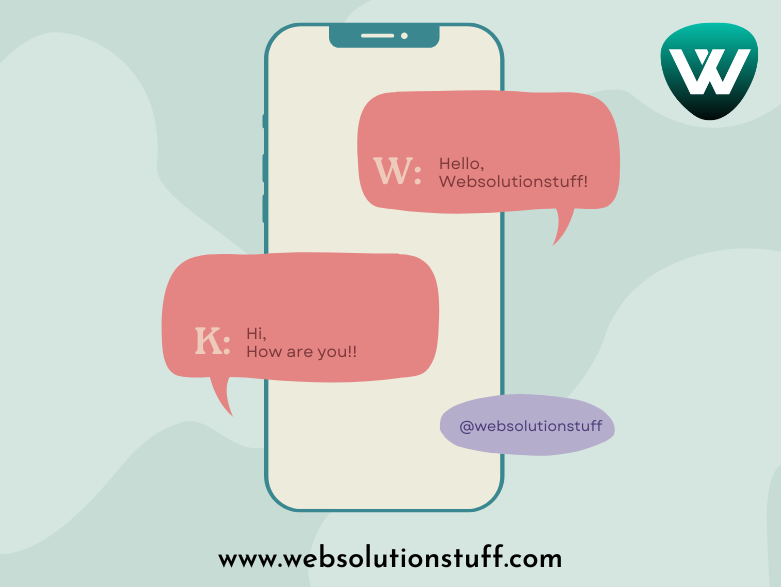
How To Build Live Chat App In Laravel 9 And Vue JS
Websolutionstuff | Feb-02-2023 | Categories : Laravel PHP VueJs
In this article, we will see how to build a live chat app in laravel 9 and vue js. Here, we will learn how to create real-time chat applications in laravel 8 and laravel 9 with vue.js and pusher. For this example need basic knowledge of laravel and vue.js for better understanding.
In laravel, easy to build modern applications with real-time interaction with the help of an event broadcasting system. which allows developers to share the same event names between the server-side code and the client-side JavaScript application. Also, we will see how to create an event in laravel 9. And learn more about Laravel Events.
Pusher is an easy and reliable platform for building real-time applications. Also, Laravel is support Pusher, which makes building realtime applications with laravel and pusher seamless.
So, let's see build chat app with vue.js and laravel 9 using pusher, real time chat application in laravel 8 and laravel 9, laravel 8/9 chat application with pusher, and how to build a laravel chat application with pusher.
Build a chat app with Laravel with Vue.js and Pusher
In this step, we will install the laravel 9 application using the following composer command.
composer create-project laravel/laravel laravel-9-vue-js-live-chat-example
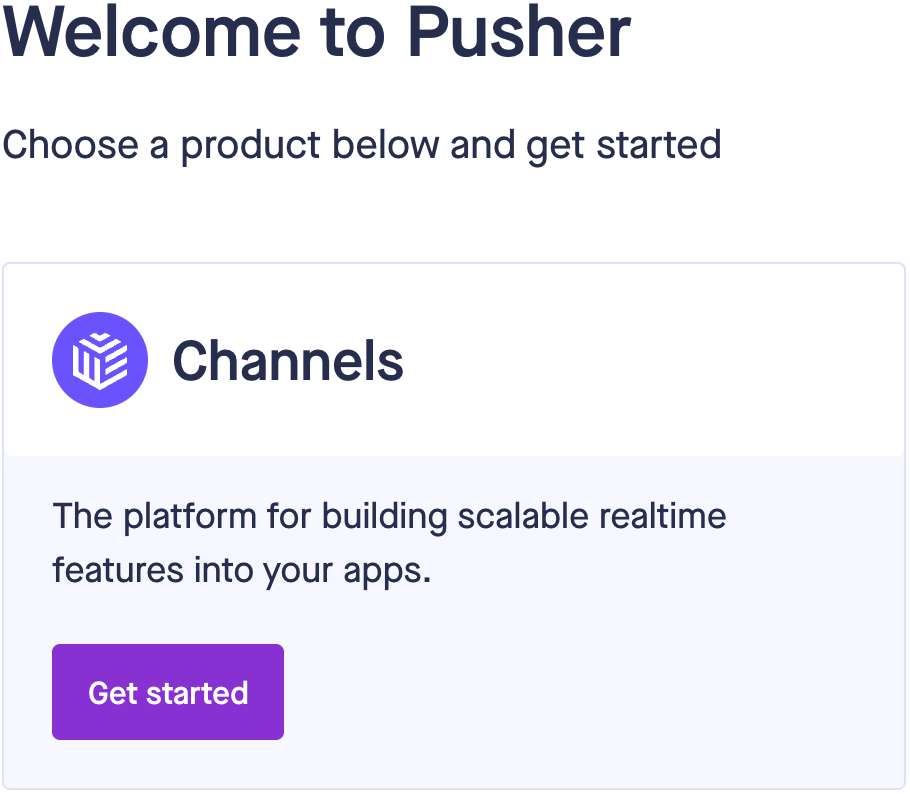
Now, we will create Pusher Account. The Channels sandbox plan is completely free. Create Pusher Account.
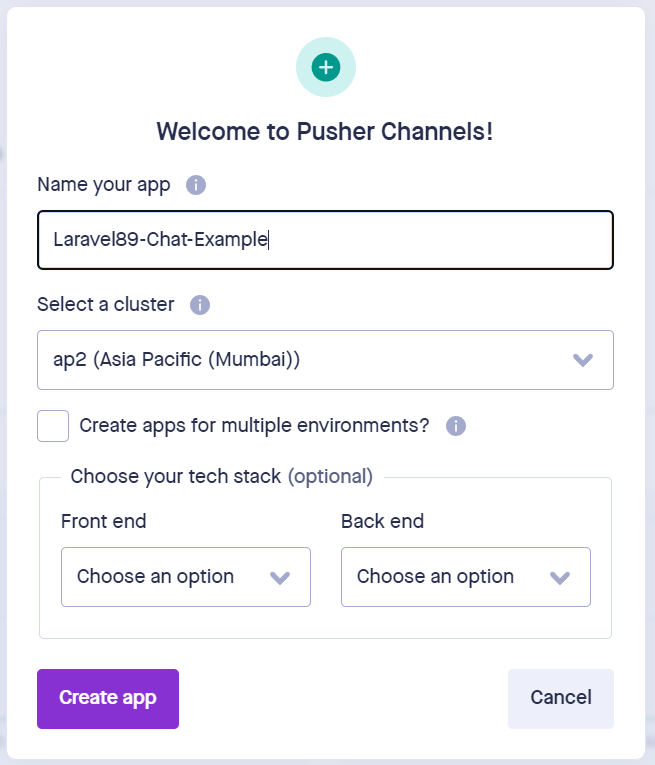
How to create a Channels app
Once you have signed up for a Pusher account you need to create a Channels.
After that, create an application and add a pusher application name, cluster, and stack. The tech stack settings are optional.
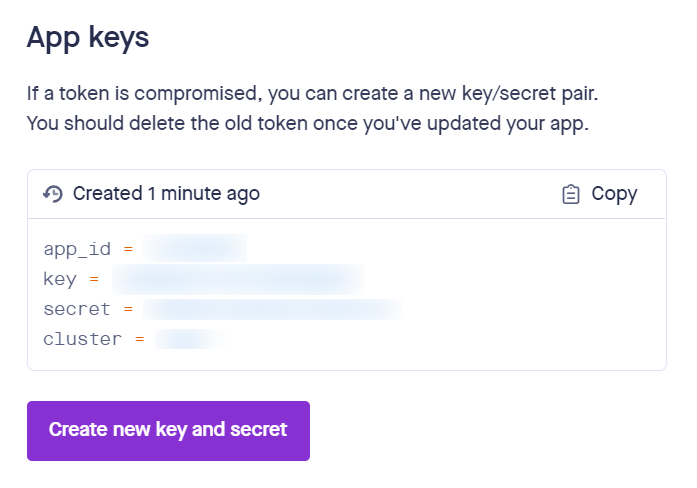
From the App Keys page note down the app_id, key, secret and cluster as you will need these to connect to your Channels app.
Set up a Laravel environment
For this tutorial, you will need PHP 7/8, Composer 2, and Node.js 16 or latest version of node. For Windows see instructions for PHP, Composer and Node.
In this step, we will set up a pusher. So, Register for the Broadcast application service by opening config/app.php and uncommenting this line.
// App\Providers\BroadcastServiceProvider::class,
Note: If you face the error Class 'Pusher\Pusher' not found add the below code into the config/app.php file.
'aliases' => [

        ...

        'Pusher' => Pusher\Pusher::class,

    ],
After that, open the .env file and change the BROADCAST_DRIVER from its default “log” value to “pusher".
BROADCAST_DRIVER=pusher
Now, we will set up the Pusher ID and key in the .env file. Laravel already integrates some of the Pusher configurations, so you just need to fill in the keys you got when you created your Channels app.
PUSHER_APP_ID=xxxx
PUSHER_APP_KEY=xxxxxx
PUSHER_APP_SECRET=xxxxxx
PUSHER_APP_CLUSTER=xxx
In this step, we will install pusher/pusher-php-server using the composer command.
composer require pusher/pusher-php-server
Now, we will install laravel Echo, which is the javascript library for listening to broadcast events and pusher-js for connecting your client to Pusher.
npm install --save laravel-echo pusher-js
After that, we will uncomment the pusher credentials in Echo Client.
resources/js/bootstrap.js
import Echo from 'laravel-echo';

window.Pusher = require('pusher-js');

window.Echo = new Echo({
    broadcaster: 'pusher',
    key: process.env.MIX_PUSHER_APP_KEY,
    cluster: process.env.MIX_PUSHER_APP_CLUSTER,
    forceTLS: true
});
The public key and cluster are already taken from your .env file that we previously updated.
In this step, we will create auth system using the following command. So, run the below command and create the basic login and register.
install the laravel/ui package
composer require laravel/ui
After that, create vue js login page using the following command.
php artisan ui vue --auth
And now compile dependencies using the below command.
npm install && npm run dev
Now, we will configure database details in the .env file.
DB_CONNECTION=mysql
DB_HOST=127.0.0.1
DB_PORT=3306
DB_DATABASE=laravel9_example
DB_USERNAME=root
DB_PASSWORD=root
After that, migrate the table into the database using the below command.
php artisan migrate
In this step, we will create Message model and create a message table using the below command.
php artisan make:model Message --migration
App/Models/Message.php
<?php

namespace App\Models;

use Illuminate\Database\Eloquent\Factories\HasFactory;
use Illuminate\Database\Eloquent\Model;

class Message extends Model
{
    use HasFactory;
    protected $fillable = ['message'];

}
Migration:
Add user_id and message columns to your messages schema.
public function up()
    {
        Schema::create('messages', function (Blueprint $table) {
            $table->id();
            $table->integer('user_id')->unsigned();
            $table->text('message');
            $table->timestamps();
        });
    }
Now run the migrations to add the messages table to the database.
php artisan migrate
Now, We will setup a one-to-many relationship between users and their many messages.
In app/Models/User.php add the messages() function to the User class
class User extends Authenticatable
{
    use HasApiTokens, HasFactory, Notifiable;

    protected $fillable = ['name','email','password',];
    protected $hidden = ['password','remember_token',];
    protected $casts = ['email_verified_at' => 'datetime',];

    //Add the below function
    public function messages()
    {
        return $this->hasMany(Message::class);
    }
}
Then we define the user() function in the Message class in app/Models/Message.php.
class Message extends Model
{
    use HasFactory;
    protected $fillable = ['message'];

    //Add the below function
    public function user()
    {
        return $this->belongsTo(User::class);
    }
}
In this step, we will add routes in the web.php file.
routes/web.php
<?php

use Illuminate\Support\Facades\Route;

/*
|--------------------------------------------------------------------------
| Web Routes
|--------------------------------------------------------------------------
|
| Here is where you can register web routes for your application. These
| routes are loaded by the RouteServiceProvider within a group which
| contains the "web" middleware group. Now create something great!
|
*/

Route::get('/', function () {
    return view('welcome');
});

Auth::routes();

Route::get('/home', [App\Http\Controllers\HomeController::class, 'index'])->name('home');
Route::get('/chat', [App\Http\Controllers\ChatsController::class,'index']);
Route::get('messages', [App\Http\Controllers\ChatsController::class,'fetchMessages']);
Route::post('messages', [App\Http\Controllers\ChatsController::class,'sendMessage']);
Now, we will create a ChatsController using the following command.
php artisan make:controller ChatsController
App/Http/Controllers/ChatsController
<?php

namespace App\Http\Controllers;
use Illuminate\Http\Request;
use App\Models\Message;
use Illuminate\Support\Facades\Auth;
use App\Events\MessageSent;

class ChatsController extends Controller
{
    public function __construct()
    {
        $this->middleware('auth');
    }

    /**
     * Show chats
     *
     * @return \Illuminate\Http\Response
     */
    public function index()
    {
        return view('chat');
    }

    /**
     * Fetch all messages
     *
     * @return Message
     */
    public function fetchMessages()
    {
        return Message::with('user')->get();
    }

    /**
     * Persist message to database
     *
     * @param  Request $request
     * @return Response
     */
    public function sendMessage(Request $request)
    {
        $user = Auth::user();

        $message = $user->messages()->create([
            'message' => $request->input('message')
        ]);

        broadcast(new MessageSent($user, $message))->toOthers();

        return ['status' => 'Message Sent!'];
    }
}
$this->middleware('auth') in __contruct() will only allow authorized users to access ChatsController’s methods.
Now, we will create a chat.blade.php file.
resources/views/chat.blade.php
@extends('layouts.app')

@section('content')

<div class="container">
    <div class="row">
        <div class="col-md-8 col-md-offset-2">
            <div class="panel panel-default">
                <div class="panel-heading">How To Build Live Chat App In Laravel 9 And Vue JS - Websolutionstuff</div>

                <div class="panel-body">
                    <chat-messages :messages="messages"></chat-messages>
                </div>
                <div class="panel-footer">
                    <chat-form
                        v-on:messagesent="addMessage"
                        :user="{{ Auth::user() }}"
                    ></chat-form>
                </div>
            </div>
        </div>
    </div>
</div>
@endsection
After that, we will create a vue component chatMessage.vue and chatForm.vue. The chat-messages component will display our chat messages and the chat-form will provide an input field and a button to send the messages.
resources/js/components/ChatMessages.vue
<template>
	<ul class="chat">
		<li class="left clearfix" v-for="message in messages" :key="message.id">
			<div class="clearfix">
				<div class="header">
					<strong>
						{{ message.user.name }}
					</strong>
				</div>
				<p>
				{{ message.message }}
				</p>
			</div>
		</li>
	</ul>
</template>
<script>
	export default {
		props: ["messages"],
	};
</script>
resources/js/components/ChatForm.vue
<template>
    <div class="input-group">
        <input
        id="btn-input"
        type="text"
        name="message"
        class="form-control input-sm"
        placeholder="Type your message here..."
        v-model="newMessage"
        @keyup.enter="sendMessage"
        />

        <span class="input-group-btn">
            <button class="btn btn-primary btn-sm" id="btn-chat" @click="sendMessage">
                Send
            </button>
        </span>
    </div>
</template>
<script>
export default {
    props: ["user"],
    data() {
        return {
        newMessage: "",
        };
    },
    methods: {
        sendMessage() {
        this.$emit("messagesent", {
            user: this.user,
            message: this.newMessage,
        });
        this.newMessage = "";
        },
    },
};
</script>
Next, we will register vue component in the root Vue instance.
resources/js/app.js
/**
 * First we will load all of this project's JavaScript dependencies which
 * includes Vue and other libraries. It is a great starting point when
 * building robust, powerful web applications using Vue and Laravel.
 */

require('./bootstrap');

window.Vue = require('vue').default;

/**
 * The following block of code may be used to automatically register your
 * Vue components. It will recursively scan this directory for the Vue
 * components and automatically register them with their "basename".
 *
 * Eg. ./components/ExampleComponent.vue -> <example-component></example-component>
 */

// const files = require.context('./', true, /\.vue$/i)
// files.keys().map(key => Vue.component(key.split('/').pop().split('.')[0], files(key).default))

Vue.component('example-component', require('./components/ExampleComponent.vue').default);
Vue.component('chat-messages', require('./components/ChatMessages.vue').default);
Vue.component('chat-form', require('./components/ChatForm.vue').default);
/**
 * Next, we will create a fresh Vue application instance and attach it to
 * the page. Then, you may begin adding components to this application
 * or customize the JavaScript scaffolding to fit your unique needs.
 */

const app = new Vue({
    el: '#app',

    //Store chat messages for display in this array.
    data: {
        messages: []
    },
    //Upon initialisation, run fetchMessages().
    created() {
        this.fetchMessages();

        window.Echo.private('chat')
        .listen('MessageSent', (e) => {
            this.messages.push({
            message: e.message.message,
            user: e.user
            });
        });
    },
    methods: {
        fetchMessages() {
            //GET request to the messages route in our Laravel server to fetch all the messages
            axios.get('/messages').then(response => {
                //Save the response in the messages array to display on the chat view
                this.messages = response.data;
            });
        },
        //Receives the message that was emitted from the ChatForm Vue component
        addMessage(message) {
            //Pushes it to the messages array
            this.messages.push(message);
            //POST request to the messages route with the message data in order for our Laravel server to broadcast it.
            axios.post('/messages', message).then(response => {
                console.log(response.data);
            });
        }
    }
});
We will use Laravel Echo to subscribe to the private chat channel and listen() for the MessageSent event.
In this step, we will create Message event using the below command. So, add the below code to that file. Also, Add the implements ShouldBroadcast interface to the MessageSent class
php artisan make:event MessageSent
app/Events/MessageSent.php
<?php

namespace App\Events;

use Illuminate\Broadcasting\Channel;
use Illuminate\Broadcasting\InteractsWithSockets;
use Illuminate\Broadcasting\PresenceChannel;
use Illuminate\Broadcasting\PrivateChannel;
use Illuminate\Contracts\Broadcasting\ShouldBroadcast;
use Illuminate\Foundation\Events\Dispatchable;
use Illuminate\Queue\SerializesModels;
use App\Models\User;
use App\Models\Message;

class MessageSent implements ShouldBroadcast
{
    use Dispatchable, InteractsWithSockets, SerializesModels;
    public $user;
    public $message;
    /**
     * Create a new event instance.
     *
     * @return void
     */
    public function __construct(User $user, Message $message)
    {
        $this->user = $user;
        $this->message = $message;
    }

    /**
     * Get the channels the event should broadcast on.
     *
     * @return \Illuminate\Broadcasting\Channel|array
     */
    public function broadcastOn()
    {
        return new PrivateChannel('chat');
    }
}
we created a private channel by returning an PrivateChannel('chat') instance, only authenticated users will be able to listen to it. So, we need a way to authorize the currently authenticated user can actually listen on the channel. So, add the below code to the channels.php file.
routes/channels.php
Broadcast::channel('chat', function ($user) {
    return Auth::check();
});
Now, we will build the application and run the application using the following command.
npm run dev
php artisan serve
Open two private web browser windows, log in as two users, and send a message from each other.
Output:

You might also like:
- Read Also: Laravel 9 User Role and Permission
- Read Also: How To Get Current Date And Time In Node.js
- Read Also: How To Create Dynamic Bar Chart In Laravel
- Read Also: How To Get Current User Location In Laravel
Recommended Post
Featured Post

How to Install PHP PDO MySQL E...
Hey there! If you're diving into PHP development on Ubuntu 22.04 and need to connect your applications to MySQL data...
Feb-28-2024

Laravel 10 CRUD Operation Step...
In this article, we will see how to create a crud operation in laravel 10. Here, we will learn about laravel 10 crud ope...
Feb-24-2023

Laravel 9 Multiple Where Condi...
In this article, we will see the laravel 9 and laravel 10 multiple where condition query example. We will learn&nbs...
Sep-30-2022

How To Fixed Header In Datatab...
Data presentation and organization are easier with data tables. They help display information in an organized way. These...
Jan-05-2023