How to Install Jenkins on Ubuntu
Websolutionstuff | Aug-07-2023 | Categories : Other
In today's fast-paced software development landscape, I've understood the significance of continuous integration and continuous delivery (CI/CD) in ensuring the swift and reliable delivery of high-quality software.
Among the plethora of tools available, Jenkins stood out as one of the most popular and versatile automation servers, promising to easily automate our build, test, and deployment processes.
As an Ubuntu user looking to harness the power of Jenkins for my projects, I embarked on a journey to install it on my Ubuntu machine. This comprehensive guide documents my step-by-step experience, enabling me to set up a robust CI/CD pipeline quickly.
Whether you're a seasoned DevOps engineer or a curious developer like me, seeking to optimize your development workflow, this article equips you with all the necessary knowledge and instructions to get Jenkins up and running smoothly.
So, let's dive into my world of Jenkins installation on Ubuntu and unlock the potential for faster, more efficient software delivery. Also, you can install Jenkins on Ubuntu 20.04, install Jenkins on Ubuntu 22.04, how to setup Jenkins in Ubuntu, and install Jenkins on Ubuntu using the terminal.
Before starting the Jenkins installation process, it's essential to ensure that your Ubuntu system's package repositories are up to date. Open a terminal and run the following commands.
sudo apt update
sudo apt upgrade
Jenkins requires Java to run. Install the Java Development Kit (JDK) on your Ubuntu machine by executing the following command.
sudo apt install default-jdk
Next, add the Jenkins repository key to your system to verify the authenticity of the Jenkins package during installation. Run the following command.
wget -q -O - https://pkg.jenkins.io/debian/jenkins.io.key | sudo apt-key add -
Now, add the Jenkins repository to the package manager's sources list.
sudo sh -c 'echo deb http://pkg.jenkins.io/debian-stable binary/ > /etc/apt/sources.list.d/jenkins.list'
Update the package list once again, then install Jenkins.
sudo apt update
sudo apt install jenkins
After the installation is complete, start the Jenkins service.
sudo systemctl start jenkins
To ensure Jenkins starts automatically upon system boot, enable the service.
sudo systemctl enable jenkins
Check if Jenkins is running by using the following command.
sudo systemctl status jenkins
Jenkins has a web-based interface accessible through your browser. Open your preferred web browser and enter the following URL.
http://your_server_ip_or_domain:8080
On your first visit to the Jenkins web interface, you will be prompted to unlock Jenkins. To retrieve the initial admin password, run the following command.
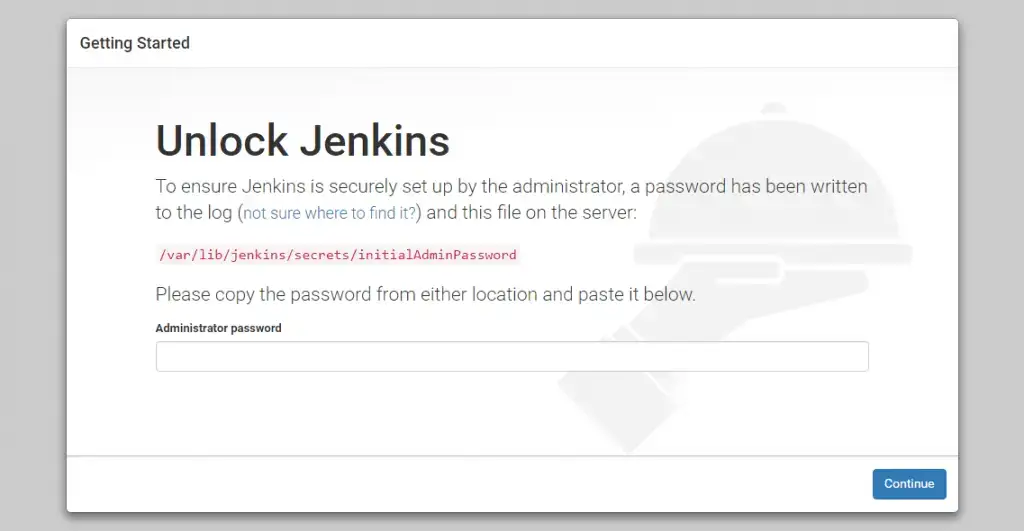
sudo cat /var/lib/jenkins/secrets/initialAdminPassword
Copy the provided password and paste it into the Jenkins web interface to unlock.
Next, you'll be given the option to install recommended plugins or select specific plugins. Choose the "Install suggested plugins" option to get started quickly.
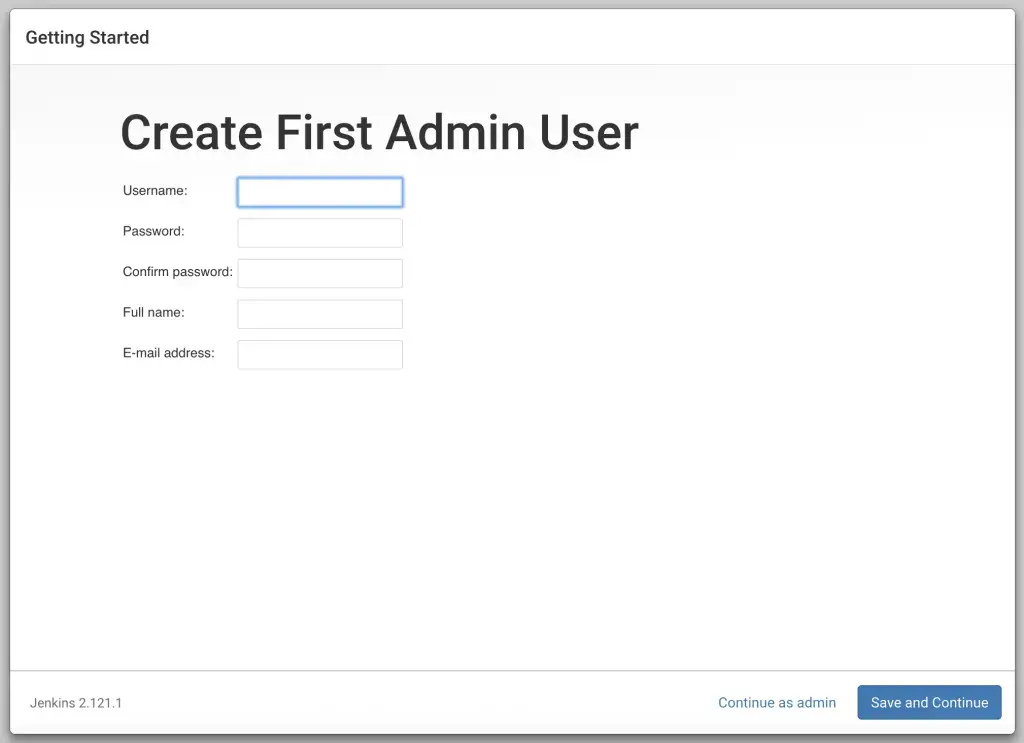
After plugin installation, you'll be prompted to create an admin user. Fill in the required details to set up your Jenkins admin account.
Congratulations! Jenkins is now installed and ready to use. You can start creating your CI/CD pipelines, jobs, and automating your development processes.
That's it! You've successfully installed Jenkins on your Ubuntu system. Enjoy the benefits of automated software delivery with Jenkins' powerful capabilities.
You might also like:
- Read Also: How To Install LAMP Server In Ubuntu 22.04
- Read Also: How To Install PHP CURL Extension In Ubuntu
- Read Also: Laravel 8 Toastr Notifications Example
- Read Also: Laravel 8 Form Class Not Found
Recommended Post
Featured Post

How To Install PHP XML Extensi...
In this article, I will guide you through the process of installing the PHP XML extension in Ubuntu. The PHP XML extensi...
Jul-19-2023

How To Integrate Email Templat...
In this article, we will see how to integrate an email template builder in laravel. Also, you can integrate an emai...
Feb-22-2023

How To Get Children Element In...
In this article, we will see how to get the children of this selector in jquery. You can use the find() method...
Jul-13-2022

How To Encrypt And Decrypt Str...
In this example we will see how to encrypt and decrypt string in laravel 8 using crypt helper, As we all know laravel fr...
May-07-2021