How To Import Export Excel & CSV File In Laravel 10
Websolutionstuff | Mar-08-2023 | Categories : Laravel
In this article, we will see how to import and export Excel & CSV files in laravel 10. Here, we will learn about laravel 10 import and export CSV and Excel files. We will create and import data to xls, and CSV files,s and also we will import data to the database using CSV or Excel files in laravel 10.
Using the maatwebsite/excel plugin you can easily import and export CSV and Excel files in laravel 10 examples. For the laravel 10 import csv/excel file using the import class, laravel 10 export csv/excel file uses the export class.
So, let's see how to import and export excel csv files in laravel 10, import and export csv files in laravel 10, laravel 10 import export excel & csv file, how to export excel file in laravel 10 and download csv and excel file in laravel 10.
In this step, we will install laravel 10 using the following command.
composer create-project --prefer-dist laravel/laravel laravel_10_import_export_csv_excel
Now, we will configure the database like database name, username, password, etc. So, open the .env file and fill in all details like below.
DB_CONNECTION=mysql
DB_HOST=127.0.0.1
DB_PORT=3306
DB_DATABASE=laravel_10_import_export
DB_USERNAME=root
DB_PASSWORD=root
In this step, we will install the maatwebsite/excel Package using the below command.
composer require maatwebsite/excel
Now, we will add some dummy records in the database using the below command.
php artisan tinker

factory(App\User::class, 100)->create();
In this step, we will add routes to the web.php file. So, add the following code to that file.
routes/web.php
<?php

use Illuminate\Support\Facades\Route;

use App\Http\Controllers\UserController;

/*
|--------------------------------------------------------------------------
| Web Routes
|--------------------------------------------------------------------------
|
| Here is where you can register web routes for your application. These
| routes are loaded by the RouteServiceProvider within a group which
| contains the "web" middleware group. Now create something great!
|
*/

Route::controller(UserController::class)->group(function(){
    Route::get('import_export', 'importExport');
    Route::post('import', 'import')->name('import');
    Route::get('export', 'export')->name('export');
});
Now, we will create the UserController using the following command.
php artisan make:controller UserController
After running this command we need to add the below code in this controller.
app/Http/Controllers/UserController.php
<?php

namespace App\Http\Controllers;

use Illuminate\Http\Request;
use App\Exports\ExportUsers;
use App\Imports\ImportUsers;
use Maatwebsite\Excel\Facades\Excel;
use App\Models\User;

class Import_Export_Controller extends Controller
{
     public function importExport()
    {
       $users = User::get();

       return view('import', compact('users'));
    }

    public function export()
    {
        return Excel::download(new ExportUsers, 'users.xlsx');
    }

    public function import()
    {
        Excel::import(new ImportUsers, request()->file('file'));

        return back();
    }
}
In this step, we will create the import class using the below command.
php artisan make:import ImportUsers --model=User
After running this command you will find the ImportUsers.php file.
app/Imports/ImportUsers.php
<?php

namespace App\Imports;

use App\Models\User;
use Maatwebsite\Excel\Concerns\ToModel;
use Maatwebsite\Excel\Concerns\WithHeadingRow;

class ImportUsers implements ToModel, WithHeadingRow
{
    /**
    * @param array $row
    *
    * @return \Illuminate\Database\Eloquent\Model|null
    */
    public function model(array $row)
    {
        return new User([
            'name' => $row[0],
            'email' => $row[1],
        ]);
    }
}
Now, we will create the export class using the below command.
php artisan make:export ExportUsers --model=User
After running this command you will find the ExportUsers.php file.
app/Export/ExportUsers.php
<?php

namespace App\Exports;

use App\Models\User;;
use Maatwebsite\Excel\Concerns\FromCollection;
use Maatwebsite\Excel\Concerns\WithHeadings;

class ExportUsers implements FromCollection, WithHeadings
{
   /**
    * @return \Illuminate\Support\Collection
    */
    public function collection()
    {
        return User::select("id", "name", "email")->get();
    }

    /**
     * Write code on Method
     *
     * @return response()
     */
    public function headings(): array
    {
        return ["ID", "Name", "Email"];
    }
}
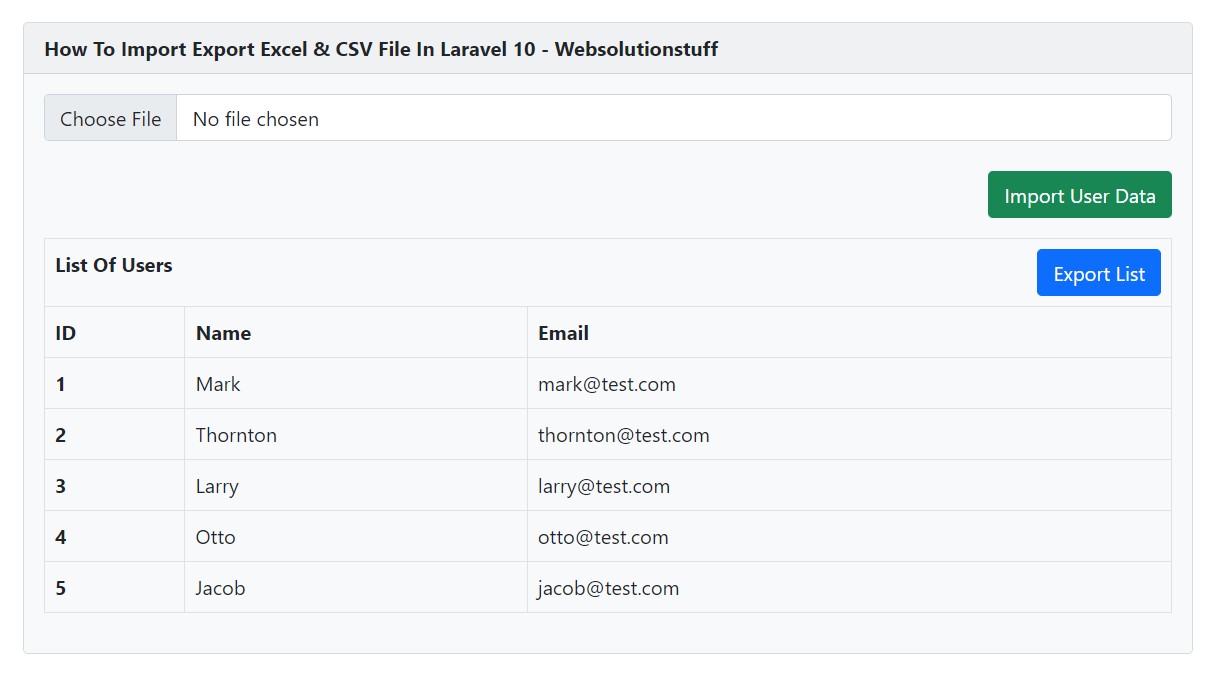
Now, we will create an import.blade.php file for viewing.
resources/views/import.blade.php
<!DOCTYPE html>
<html>
	<head>
		<title>How To Import Export Excel & CSV File In Laravel 10 - Websolutionstuff</title>
		<meta charset="utf-8">
		<meta name="viewport" content="width=device-width, initial-scale=1">
		<link href="https://cdn.jsdelivr.net/npm/[email protected]/dist/css/bootstrap.min.css" rel="stylesheet">
	</head>
	<body>
		<div class="container">
			<div class="card bg-light mt-5">
				<div class="card-header">
					<b>How To Import Export Excel & CSV File In Laravel 10 - Websolutionstuff</b>
				</div>
				<div class="card-body">
					<form action="{{ route('import') }}" method="POST" enctype="multipart/form-data">
						@csrf
						<input type="file" name="file" class="form-control">
						<br>
						<button class="btn btn-success float-end mb-3">Import User Data</button>
					</form>

					<table class="table table-bordered mt-3">
						<tr>
							<th colspan="3">
								List Of Users
								<a class="btn btn-primary float-end" href="{{ route('export') }}">Export List</a>
							</th>
						</tr>
						<tr>
							<th>ID</th>
							<th>Name</th>
							<th>Email</th>
						</tr>
						@foreach($users as $user)
						<tr>
							<td>{{ $user->id }}</td>
							<td>{{ $user->name }}</td>
							<td>{{ $user->email }}</td>
						</tr>
						@endforeach
					</table>
				</div>
			</div>
		</div>
	</body>
</html>
Now, we will run import and export CSV and Excel files in laravel 10.
php artisan serve
Output:
You might also like:
- Read Also: How to Convert Excel File into JSON in Javascript
- Read Also: How To Integrate Email Template Builder In Laravel
- Read Also: Laravel 10: New Features And Release Date
- Read Also: How To Use OpenAI In Laravel 8/9
Recommended Post
Featured Post

How To Generate PDF File In La...
In this article, we will see how to generate a pdf file in laravel 10. Here, we will learn about laravel 10 ge...
Mar-10-2023

How To Copy Text To Clipboard...
In this article, we will see how to copy text to the clipboard in react js. you will learn how to copy text to...
Aug-31-2022

Scrolla - jQuery Plugin for Re...
In this tutorial we will see how to use scrolla - jQuery plugin for reveal animations when scrolling a mouse. this jquer...
Apr-21-2021

Routing - Laravel 7/8 Routing...
In this article, we will give you information about the basic route, named route, and advanced route in laravel 7 and la...
Nov-01-2020