Razorpay Payment Gateway Integration in Laravel 10 and VueJS 3
Websolutionstuff | Aug-30-2023 | Categories : Laravel VueJs
In the rapidly advancing world of technology, the combination of Laravel 10 and VueJS 3 is unparalleled and exceptionally powerful for developing high-end applications that run seamlessly. With the increasing demand for e-commerce and content-driven websites, the need for a reliable payment gateway becomes essential.
Therefore, let's dive right into the process of integrating the Razorpay payment gateway into your Laravel 9/10 versions, alongside VueJS 3.
Whether you're developing a cutting-edge e-commerce platform or a content-driven website, the ability to process transactions securely and efficiently can make or break your user experience.
Enter the powerful duo of Laravel 10 and VueJS 3 — two industry-leading technologies that, when combined, open up a world of possibilities for crafting high-performance, interactive, and secure web applications.
In this article, we'll embark on a journey to explore the integration of the renowned Razorpay payment gateway into the latest versions of these frameworks, Laravel 10 and VueJS 3.
Laravel, known for its elegant syntax and comprehensive feature set, has been a stalwart in the world of PHP development.
It empowers developers to create robust and scalable applications with ease. On the other hand, VueJS 3, the latest iteration of this progressive JavaScript framework, offers a dynamic and efficient way to build engaging user interfaces.
By combining Laravel 10's backend prowess with VueJS 3's frontend magic, we'll demonstrate how to create an exceptional web application capable of handling payments through Razorpay.
This integration not only ensures the seamless flow of funds but also elevates your application's user experience to new heights.
So, without further ado, let's dive into the world of Laravel 10, VueJS 3, and Razorpay to equip your web application with the tools it needs to thrive in the digital age.
Before you begin, ensure you have the following prerequisites installed:
- PHP, Laravel 10
- Node.js, npm (for VueJS)
- Composer
- Razorpay Account (for API keys)
Use the Laravel CLI to create a new project.
composer create-project laravel/laravel razorpay-payment-app
cd razorpay-payment-app
composer require laravel/ui
php artisan ui vue
npm install
npm run dev
Note: If you face this error “Cannot find module ‘webpack/lib/rules/DescriptionDataMatcherRulePlugin’”
Run the below command.
npm i vue-loader
Your app.js file will be compiled and saved to public/js/app.js. Make sure to include a root element with an id of 'app' in your HTML scaffolding; otherwise, Vue won't know where to mount the components.
resources/views/app.blade.php
<div id="app"></div>
<script src="{{ asset('js/app.js') }}"></script>
resources/js/app.js
import App from './App.vue';
const app = new Vue({
  el: '#app',
  template: "",
  components: {
    App,
  },
});
For now, this file contains payment data; in your real-time application, you'll need to pass user information and the amount when the 'pay' button is clicked.
resources/js/App.vue
<template>
  <section class="payment">
    <div>
      <span>Amount:</span>
      <input type="text" v-model="amount" />
      <button type="button" @click="razorPay">Pay with Razorpay</button>
    </div>
  </section>
</template>

<script>
import axios from "axios";

export default {
  name: "app",
  data() {
    return {
      amount: 100,
    };
  },
  methods: {
    razorPay() {
      axios
        .post("/api/payment/razorpay", { amount: this.amount })
        .then((res) => {
          if (res.data) {
            window.location.href = "/pay/razorpay?key=" + res.data.key + "&amount=" + res.data.amount + "&order_id=" + res.data.order_id;
          }
        })
        .catch((err) => {});
    },
  },
};
</script>
Create an Account from here: https://razorpay.com
Get key and secret from here: https://dashboard.razorpay.com/app/keys
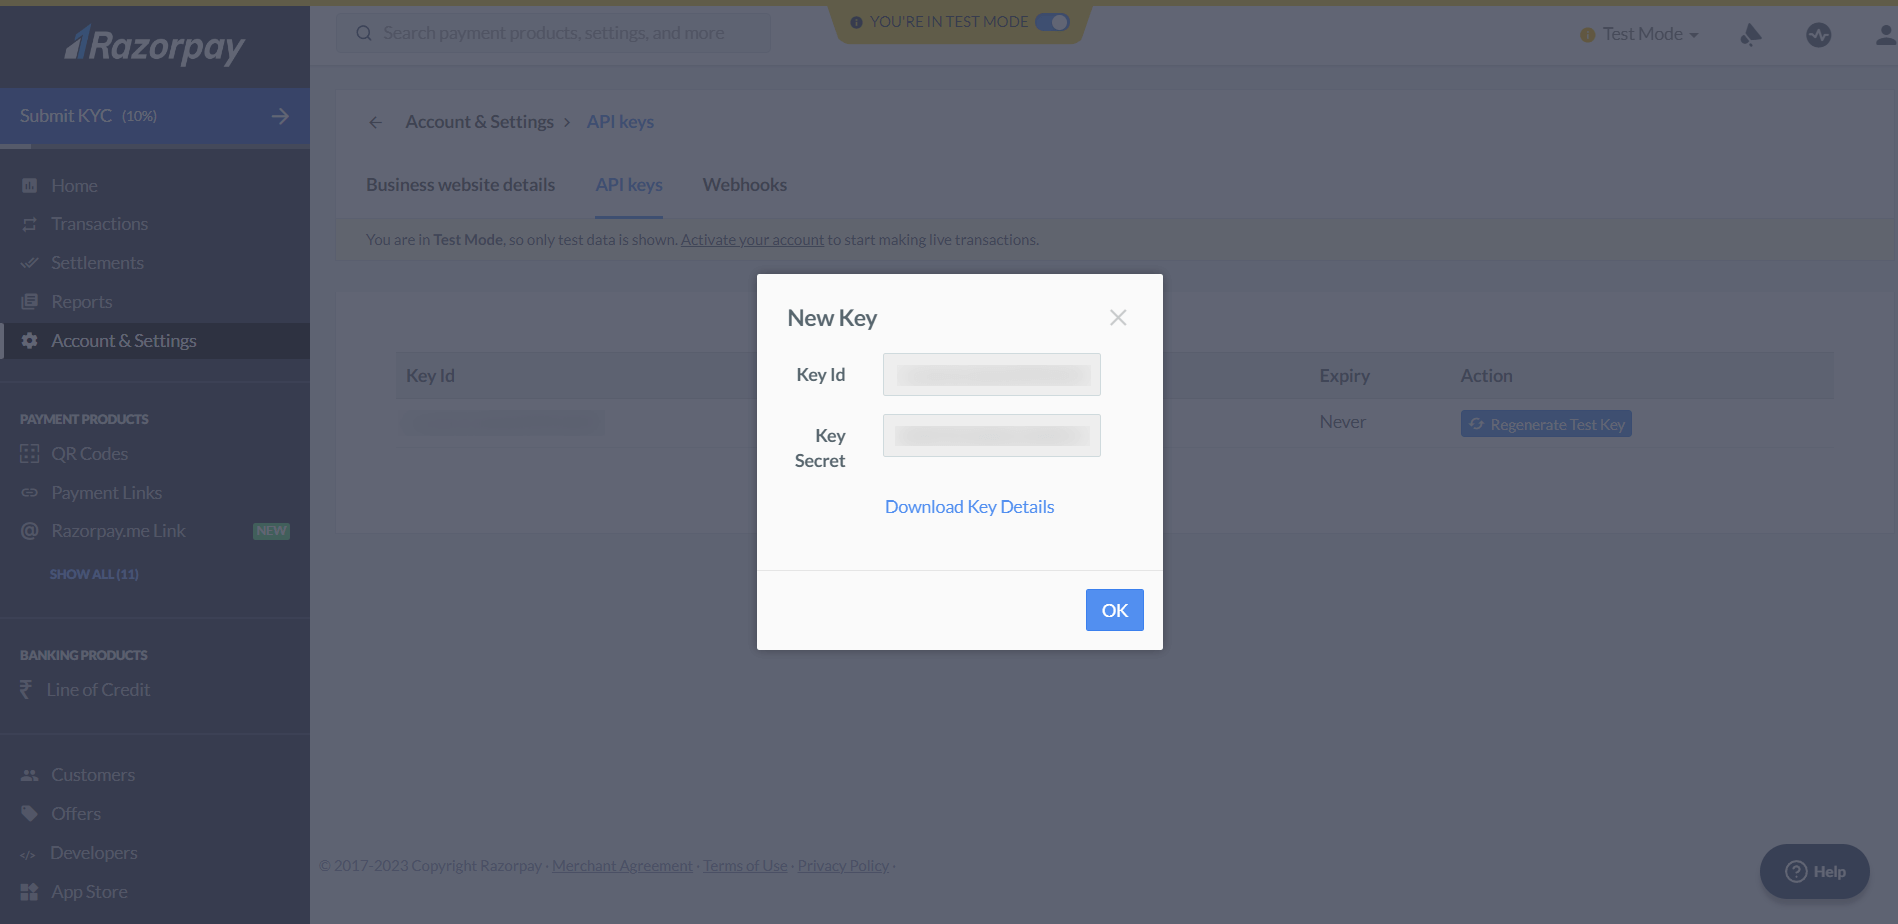
Open the .env file and add the RazorPay key and secret to it.
.env
RZ_KEY_ID=YOUR_KEY
RZ_SECRET=YOUR_SECRET
Use the below command to install the RazorPay package.
composer require razorpay/razorpay
Create a config file to access .env values and use the below code.
config/values.php
 env('RZ_KEY_ID', 'YOUR_KEY'),
  'razorpaySecret' => env('RZ_SECRET', 'YOUR_SECRET'),
];
Run the below command to create a controller.
php artisan make:controller RazorPayController
app/Http/Controllers/RazorPayController.php
order->create([
     'receipt' => '123',
     'amount' => $request->amount * 100,
     'currency' => 'INR'
   ]); // Creates Razorpay order

   $data = [
     "key"               => Config("values.razorpayKey"),
     "amount"            => $request->amount * 100,
     "order_id"          => $orderData['id'],
   ];
   return response()->json($data, 200);
 }

 function verify(Request $request)
 {
   $success = true;
   $error = "Payment Failed!";

   if (empty($request->razorpay_payment_id) === false) {
     $api = new Api(Config("values.razorpayKey"), Config("values.razorpaySecret"));
     try {
       $attributes = [
         'razorpay_order_id' => $request->razorpay_order_id,
         'razorpay_payment_id' => $request->razorpay_payment_id,
         'razorpay_signature' => $request->razorpay_signature
       ];
       $api->utility->verifyPaymentSignature($attributes);
     } catch (SignatureVerificationError $e) {
       $success = false;
       $error = 'Razorpay Error : ' . $e->getMessage();
     }
   }

   if ($success === true) {
     // Update database with success data
     // Redirect to success page
     return redirect('/');
   } else {
     // Update database with error data
     // Redirect to payment page with error
     // Pass $error along with route
     return redirect('/');
   }
 }
}
As we progress in our tutorial on Razorpay payment gateway integration, let's move on to adding routes for displaying the Razorpay page and verifying requests. Open the routes/web.php file and use the following code.
routes/web.php
use App\Http\Controllers\RazorPayController;

Route::view('/pay/razorpay', 'razorpay');
Route::post('/pay/verify', [RazorPayController::class, 'verify']);
Now, let's include an API route accessible via VueJS. To achieve this, use the following code.
routes/api.php
use App\Http\Controllers\RazorPayController;

Route::post('payment/razorpay', [RazorPayController::class, 'razorpay'])->name('paymentRazorpay');
This is the Razorpay gateway, where users will enter their credentials and make payments using various methods. Here, you can input your company or personal details such as name, description, and logo to provide users with information about who they are making payments to.
resources/views/razorpay.blade.php
<script src="https://checkout.razorpay.com/v1/checkout.js"></script>
<form name='razorpayform' action="/pay/verify" method="POST">
 <input type="hidden" name="_token" value="{{ csrf_token() }}">
 <input type="hidden" name="razorpay_payment_id" id="razorpay_payment_id">
 <input type="hidden" name="razorpay_signature" id="razorpay_signature">
 <input type="hidden" name="razorpay_order_id" id="razorpay_order_id" value="<?php echo request()->order_id ?>">
</form>
<script>
 var options = {
   "key": "<?php echo request()->key ?>",
   "amount": "<?php echo request()->amount ?>",
   "currency": "INR",
   "name": "YOUR COMPANY NAME",
   "description": "YOUR COMPANY DESCRIPTION",
   "image": "YOUR COMPANY IMAGE",
   "order_id": "<?php echo request()->order_id ?>",
   "handler": function(response) {
     alert(response.razorpay_payment_id);
     alert(response.razorpay_order_id);
     alert(response.razorpay_signature)
   },
   "theme": {
     "color": "#F37254"
   }
 };
 options.handler = function(response) {
   document.getElementById('razorpay_payment_id').value = response.razorpay_payment_id;
   document.getElementById('razorpay_signature').value = response.razorpay_signature;
   document.razorpayform.submit();
 };
 options.theme.image_padding = false;
 options.modal = {
   ondismiss: function() {
     window.location.href = "/pay?payment=false"
   },
   escape: true,
   backdropclose: false
 };
 var rzp1 = new Razorpay(options);
 rzp1.on('payment.failed', function(response) {
   alert(response.error.code);
   alert(response.error.description);
   alert(response.error.source);
   alert(response.error.step);
   alert(response.error.reason);
   alert(response.error.metadata.order_id);
   alert(response.error.metadata.payment_id);
 });
 rzp1.open();
</script>
You can also prefill user data if you have already; you need to add this under options.
prefill: {
  name: “USER NAME”,
  email: “USER EMAIL”,
  phone: “USER CONTACT”
}
The user interface will look something like this.

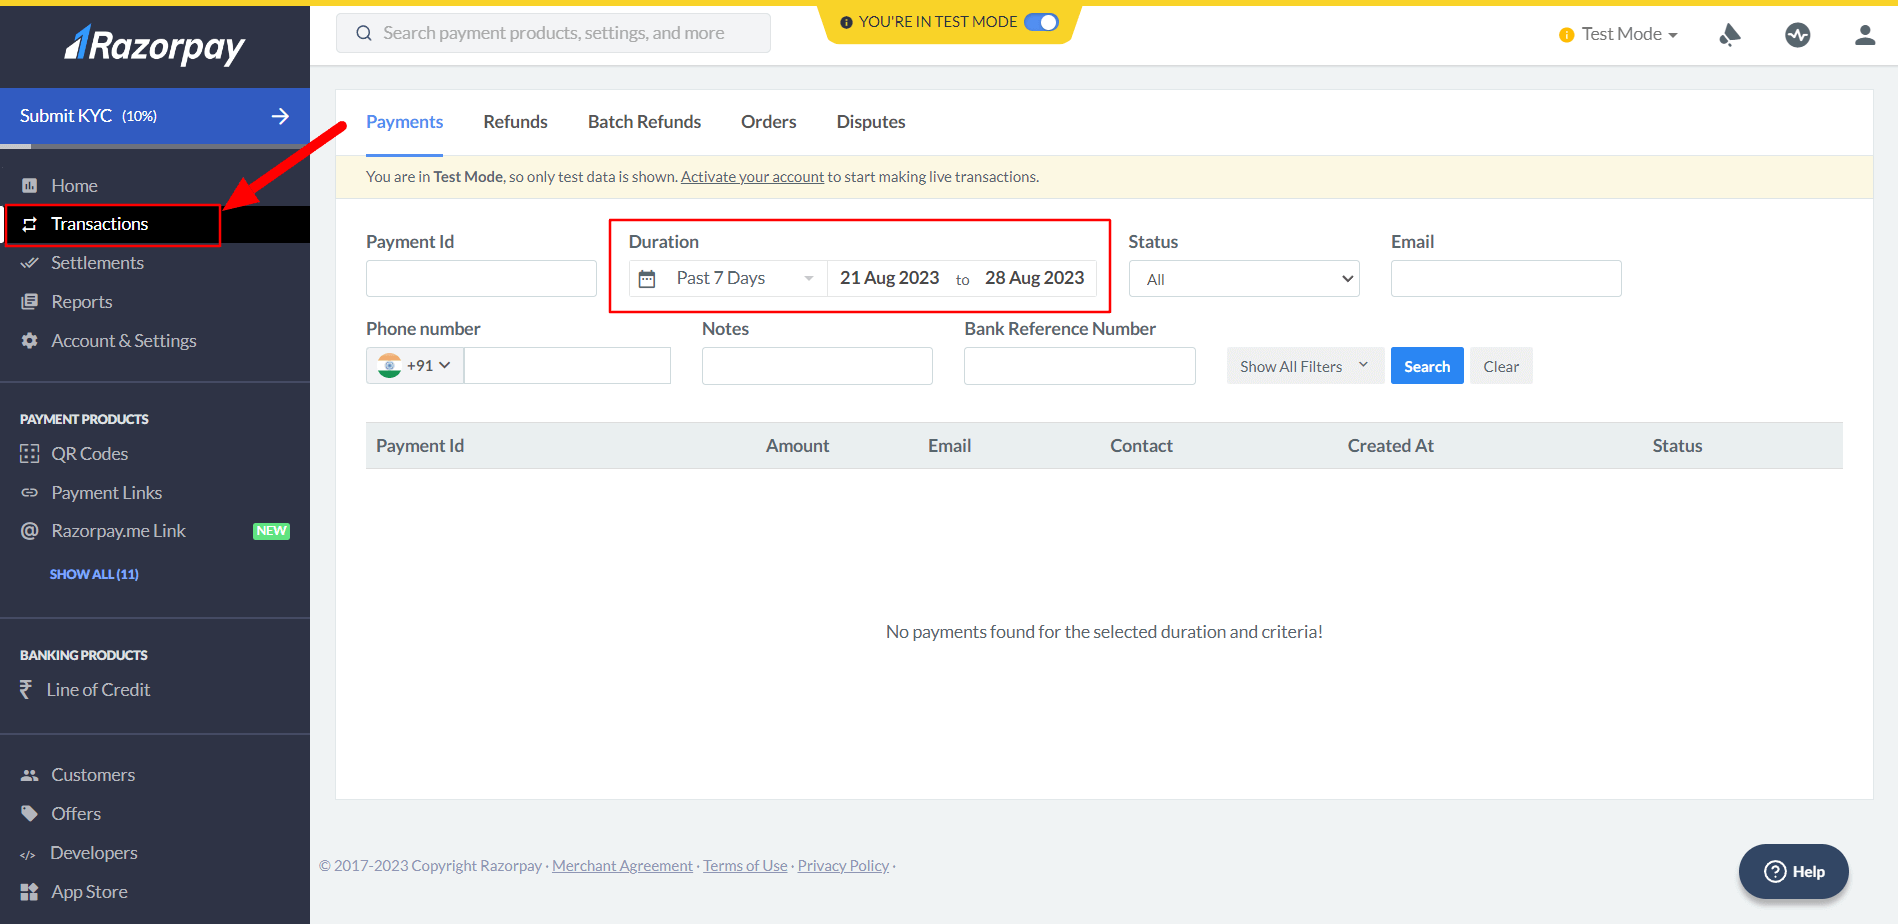
Now it’s time to check the payment transaction; for that, visit the RazorPay Dashboard.
I trust that the Razorpay payment gateway integration tutorial has met your expectations. Please do not hesitate to reach out to us if you have any questions, suggestions, or feedback. Additionally, you can explore more about VueJS and Laravel individually by visiting our tutorials pages.
At Websolutionstuff, we boast a team of skilled developers with expertise in both backend and frontend development. Our dedicated full-stack developers meticulously analyze project requirements and challenges from both frontend and backend perspectives to deliver the optimal solution.
Are you in search of developers with comprehensive experience in both frontend and backend development? If the answer is yes, waste no time and get in touch with us to hire full-stack developers.
You might also like:
Recommended Post
Featured Post

How To Validate Phone Number I...
In this article, we will see how to validate phone numbers in laravel 10. Here, we will learn about mobile number v...
May-10-2023

How to Convert Datetime into M...
Converting DateTime into milliseconds in PHP can be useful for various applications, such as timestamping events or meas...
Mar-15-2024

Laravel 8 Socialite Login with...
In this tutorial, we will learn laravel 8 socialite login with facebook account, as you all know currently many websites...
Mar-08-2021

MilesWeb Review: Why Go for It...
For finding the right web hosting provider, you need to do a lot of research. There are hundreds of web hosting provider...
Nov-12-2021