How To Integrate Swagger In laravel 10
Websolutionstuff | Aug-18-2023 | Categories : Laravel
In the dynamic realm of modern web development, ensuring that APIs are well-documented, easy to comprehend, and seamlessly interact with various clients has become an imperative. This is precisely where Swagger steps in – a potent tool designed to construct, develop, and document APIs.
Being a developer deeply rooted in Laravel, the PHP framework renowned for its elegance, Laravel 10 presents itself as a robust platform for crafting high-caliber web applications.
Merging the finesse of Laravel with Swagger's capabilities not only streamlines API development but also opens a realm of possibilities.
In this article, I invite you to join me on an exploratory journey as we delve into the intricacies of seamlessly integrating Swagger into Laravel 10 projects. Together, we'll uncover how this integration empowers developers like us to forge APIs complete with lucid documentation, interactive features, and effortless testing capabilities.
Whether I'm a seasoned Laravel developer seeking to amplify my API development workflow or a newcomer eager to grasp the essentials, this guide promises a step-by-step walkthrough of assimilating Swagger into your Laravel 10 application.
From grasping the core tenets of Swagger and API documentation to executing it effectively within Laravel 10, this article is an all-encompassing manual. Armed with this knowledge, I'll be well-equipped to transform my APIs into models of accessibility, user-friendliness, and developer convenience.
Join me as we embark on this enlightening journey, where we'll harness the potent synergy between Laravel 10 and Swagger.
Our destination? The realm of APIs that transcend mere functionality and become a source of delight for users and developers alike.
So, with eagerness fueling our strides, let's commence this exhilarating integration process.
Swagger, now known as the OpenAPI Specification, is a widely adopted framework for designing, building, and documenting RESTful APIs.
It provides a standardized way to define the structure and behavior of APIs, making it easier for developers to understand, interact with, and consume APIs.
The main goal of Swagger/OpenAPI is to enhance the communication between API developers and consumers by offering a clear and concise way to describe how an API works.
Integrating Laravel with Swagger, or the OpenAPI Specification, offers a multitude of benefits that enhance the development and documentation of APIs within your Laravel projects. Here are some key advantages:
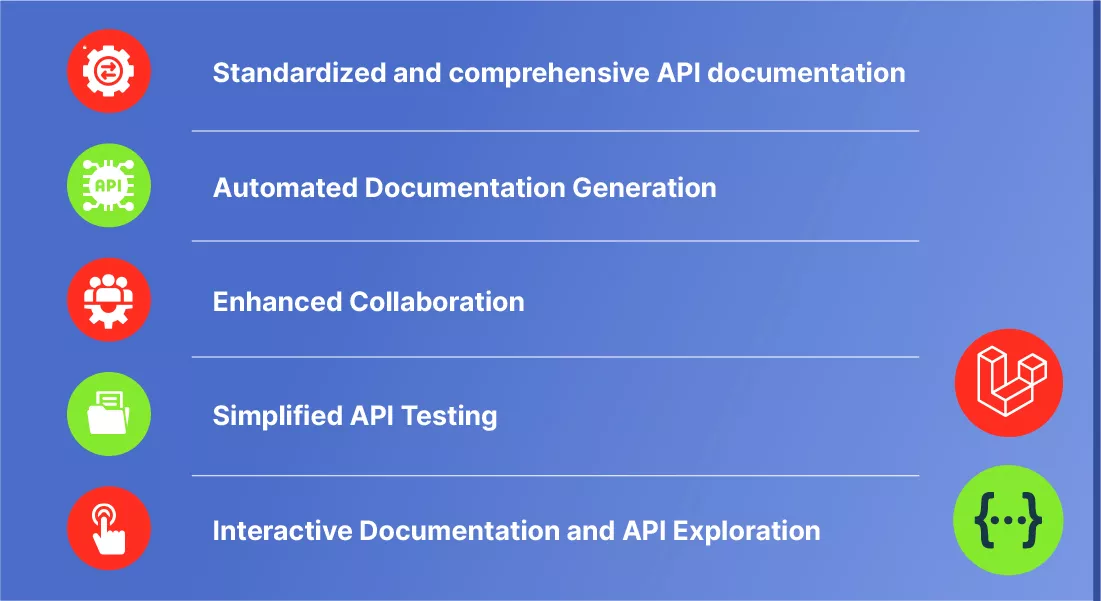
Clear API Documentation: Swagger provides an automated and visually appealing way to generate API documentation.
Improved Communication: By using Swagger to define your API's structure and behavior, you establish a standardized format for describing how the API works.
Interactive Documentation: Swagger generates interactive documentation that enables developers to explore your API endpoints directly from a user-friendly web interface.
Ease of Testing: Swagger's interactive documentation includes the capability to make test API requests directly from the documentation page.
Consistency and Standardization: When you integrate Swagger with Laravel, you enforce a consistent structure for your API endpoints, request/response formats, and error handling.
Validation and Error Handling: Swagger specifications can include validation rules for request parameters and payloads.
Before integrating Swagger, make sure you have a Laravel 10 project set up. You can create a new Laravel project using Composer.
composer create-project laravel/laravel swagger-integration
L5-Swagger is a popular Laravel package that simplifies Swagger integration. Install it via Composer.
composer require darkaonline/l5-swagger
Then install tymon/jwt-auth package using the composer command.
composer require tymon/jwt-auth
After installing the tymon/jwt-auth package, publish the configuration file by running the following command in the terminal which will create a file config/jwt.php.
php artisan vendor:publish --provider="Tymon\JWTAuth\Providers\LaravelServiceProvider"
Next, we need to create JWT secret key by running the following command.
php artisan jwt:secret
Publish the configuration file and assets required by L5-Swagger.
php artisan vendor:publish --provider "L5Swagger\L5SwaggerServiceProvider"
Open/Add the UserController and add the register method to handle user registration. Here’s an example.
/**
* @OA\Post(
     *     path="/api/register",
     *     summary="Register a new user",
     *     @OA\Parameter(
     *         name="name",
     *         in="query",
     *         description="User's name",
     *         required=true,
     *         @OA\Schema(type="string")
     *     ),
     *     @OA\Parameter(
     *         name="email",
     *         in="query",
     *         description="User's email",
     *         required=true,
     *         @OA\Schema(type="string")
     *     ),
     *     @OA\Parameter(
     *         name="password",
     *         in="query",
     *         description="User's password",
     *         required=true,
     *         @OA\Schema(type="string")
     *     ),
     *     @OA\Response(response="201", description="User registered successfully"),
     *     @OA\Response(response="422", description="Validation errors")
     * )
     */
    public function register(Request $request)
    {
        $validatedData = $request->validate([
            'name' => 'required|string|max:255',
            'email' => 'required|string|email|unique:users|max:255',
            'password' => 'required|string|min:8',
        ]);

        $user = User::create([
            'name' => $validatedData['name'],
            'email' => $validatedData['email'],
            'password' => Hash::make($validatedData['password']),
        ]);

        return response()->json(['message' => 'User registered successfully'], 201);
    }
Create a LoginController to handle the login logic with the following command.
php artisan make:controller LoginController
Add the following code to LoginController.
/**
     * @OA\Post(
     *     path="/api/login",
     *     summary="Authenticate user and generate JWT token",
     *     @OA\Parameter(
     *         name="email",
     *         in="query",
     *         description="User's email",
     *         required=true,
     *         @OA\Schema(type="string")
     *     ),
     *     @OA\Parameter(
     *         name="password",
     *         in="query",
     *         description="User's password",
     *         required=true,
     *         @OA\Schema(type="string")
     *     ),
     *     @OA\Response(response="200", description="Login successful"),
     *     @OA\Response(response="401", description="Invalid credentials")
     * )
     */
    public function login(Request $request)
    {
        $credentials = $request->only('email', 'password');
 if (Auth::attempt($credentials)) {
            $token = Auth::user()->createToken('api_token')->plainTextToken;
            return response()->json(['token' => $token], 200);
        }
return response()->json(['error' => 'Invalid credentials'], 401);
    }
Open the UserController.php file and add the following code to fetch the logged-in user details.
/**
     * @OA\Get(
     *     path="/api/user",
     *     summary="Get logged-in user details",
     *     @OA\Response(response="200", description="Success"),
     *     security={{"bearerAuth":{}}}
     * )
     */
    public function getUserDetails(Request $request)
    {
        $user = $request->user();
        return response()->json(['user' => $user], 200);
    }
Open the routes/web.php file in your Laravel project. This is where you'll define your routes. Here's an example of creating a simple route list.
Route::post('/register', 'App\Http\Controllers\UserController@register');
Route::post('/login', 'App\Http\Controllers\LoginController@login');
Route::get('/user', 'App\Http\Controllers\UserController@getUserDetails')->middleware('auth:sanctum');
You can add this to app/Http/Controllers/Controller.php.
/**
 * @OA\Info(
 *    title="Swagger with Laravel",
 *    version="1.0.0",
 * )
 * @OA\SecurityScheme(
 *     type="http",
 *     securityScheme="bearerAuth",
 *     scheme="bearer",
 *     bearerFormat="JWT"
 * )

 */
Then Generate the Swagger documentation by running the following command
php artisan l5-swagger:generate
To view the Swagger documentation in your web browser simply navigate to the following URL: http://your-app-url/api/documentation
Upon accessing the Swagger UI, you'll have the opportunity to view the available GET/POST endpoints along with their respective mandatory parameters. Furthermore, you'll discover extensive details regarding the potential responses, all managed through the Swagger annotations within the controller's file.
Within the Swagger UI, you'll come across an "Authorize" button or an input field. By clicking this button, a modal or input field will appear, enabling you to manually input the bearer token necessary for accessing authenticated APIs.
Conclusion:
By following these steps, you'll successfully integrate Swagger into your Laravel 10 project, creating comprehensive API documentation and an interactive interface for testing and exploration. This integration enhances your API development process and promotes collaboration among developers and consumers.
You might also like:
- Read Also: How To Integrate Email Template Builder In Laravel
- Read Also: Laravel 9 Paypal Payment Gateway Integration
- Read Also: How To Integrate Mailchimp API In Laravel 9
- Read Also: How To Install php-zip Extension In Ubuntu
Recommended Post
Featured Post

How to Integrate Cashfree Paym...
Hello developers! Today, we're about to embark on a journey to elevate our Laravel applications by integrating...
Feb-12-2024

Laravel 10 Change Column Name...
In this article, we will see laravel 10 change column names and data types in migration. Here, we will learn about...
Apr-19-2023

Laravel 9 Inner Join Query Exa...
In this article, we will see laravel 9 inner join query example. Also, see how to join two tables in laravel 9. In larav...
Mar-30-2022

Laravel 9 Many To Many Relatio...
In this article, we will see laravel 9 many to many relationship example. Also, you can use many to many relationsh...
Apr-03-2022