How To Add Toastr Notification In Laravel
Websolutionstuff | May-29-2020 | Categories : Laravel PHP jQuery CSS Bootstrap
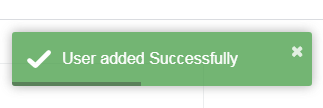
In this tutorial, I will show you how to add toastr notification in laravel application. There are many types of notifications available to display different messages in laravel or PHP like simple pop-up notifications using jquery, display messages using bootstrap modal, display notifications using flash message, and toastr message notifications.
So, let's see how to add toastr notification in laravel 6/7/8, toastr notification example in laravel 6/7/8, how to add a custom message in toastr notification, how to use toastr in laravel, how to install toastr in laravel 8, toast notification jquery.
First, you need to add bootstrap CSS, Jquery js, toastr CSS, and toastr Javascript in your main view blade file, I have added the below CDN in the <head> tag.
<head>
    <title>Laravel Toastr Notification Example - websolutionstuff.com</title>

    <link href="https://cdnjs.cloudflare.com/ajax/libs/twitter-bootstrap/4.0.0-
     alpha/css/bootstrap.css" rel="stylesheet">

    <script src="https://ajax.googleapis.com/ajax/libs/jquery/3.5.1/jquery.min.js"></script>

	<link rel="stylesheet" type="text/css"
     href="https://cdnjs.cloudflare.com/ajax/libs/toastr.js/latest/toastr.min.css">

    <script src="https://cdnjs.cloudflare.com/ajax/libs/toastr.js/latest/js/toastr.min.js"></script>
</head>
Then after we need to add different toastr messages in the script tag like below.
<script>
  @if(Session::has('message'))
  toastr.options =
  {
  	"closeButton" : true,
  	"progressBar" : true
  }
  		toastr.success("{{ session('message') }}");
  @endif

  @if(Session::has('error'))
  toastr.options =
  {
  	"closeButton" : true,
  	"progressBar" : true
  }
  		toastr.error("{{ session('error') }}");
  @endif

  @if(Session::has('info'))
  toastr.options =
  {
  	"closeButton" : true,
  	"progressBar" : true
  }
  		toastr.info("{{ session('info') }}");
  @endif

  @if(Session::has('warning'))
  toastr.options =
  {
  	"closeButton" : true,
  	"progressBar" : true
  }
  		toastr.warning("{{ session('warning') }}");
  @endif
</script>
After that, we need to display messages in the view file using the redirect URL in the controller. So, we need to add some code to the controller also. So, copy the below code in your controller.
return redirect()->route('your route name')->with('message','Data added Successfully');

return redirect()->route('your route name')->with('error','Data Deleted');

return redirect()->route('your route name')->with('Warning','Are you sure you want to delete? ');

return redirect()->route('your route name')->with('info','This is xyz information');
So, I hope you will be successfully implementing this code and displaying the different messages in your laravel applications.

You might also like :
- Read Also: Carbon Add Days To Date In Laravel
- Read Also: Carbon diffForHumans Laravel Example
- Read Also: Laravel whereDate and whereDay Example
- Read Also: How To Encrypt And Decrypt String In Laravel 8
Recommended Post
Featured Post

How To Get Last 7 Days Record...
In this example, we will see how to get the last 7 days record in laravel 8. You can simply get the last 7 days record u...
Jan-31-2022

Laravel 9 Many To Many Relatio...
In this article, we will see laravel 9 many to many relationship example. Also, you can use many to many relationsh...
Apr-03-2022

Laravel 8 One To One Relations...
In this example we will see laravel 8 one to one relationship example also you can use one to one relationship in l...
Nov-01-2021

Laravel 9 User Roles and Permi...
In this article, we will see laravel 9 user roles and permissions without package. Roles and permissions are an imp...
Apr-14-2022