How To Create Dynamic Pie Chart In Laravel 9
Websolutionstuff | Mar-20-2022 | Categories : Laravel PHP jQuery
In this article, we will see how to create a dynamic pie chart in laravel 9. Pie charts are used to represent data in graphics view. for the creation of a dynamic pie chart example, you need to create a model, controller, route, blade file, and database.
So, let's see dynamic pie chart in laravel 9, laravel 9 pie chart js, dynamic charts in laravel 9, create dynamic pie chart in laravel 9, pie chart in PHP.
Step 1 : Install Laravel 9
Step 2 : Create Migration Table
Step 3 : Add Route
Step 4 : Create Controller And Model
Step 5 : Add Code In Model And Controller
Step 6 : Create Blade File
In this step, we will create the laravel 9 project using the below command.
composer create-project --prefer-dist laravel/laravel echart
After project setup, we need dynamic data for the pie chart example. So, we have to create migration for the "product" table using the below command.
php artisan make:migration create_products_table --create=products
After run this command you will find the PHP file on location "database/migrations/". And in this file add the below code.
<?php

use Illuminate\Database\Migrations\Migration;
use Illuminate\Database\Schema\Blueprint;
use Illuminate\Support\Facades\Schema;

class CreateProductsTable extends Migration
{
    /**
     * Run the migrations.
     *
     * @return void
     */
    public function up()
    {
        Schema::create('products', function (Blueprint $table) {
            $table->id();
            $table->string('name')->nullable();
            $table->integer('price')->nullable();
            $table->integer('year')->nullable();
            $table->string('product_type')->nullable();
            $table->timestamps();
        });
    }

    /**
     * Reverse the migrations.
     *
     * @return void
     */
    public function down()
    {
        Schema::dropIfExists('products');
    }
}
After these changes we need to run this migration by the following command in our terminal:
php artisan migrate
Now, add a route in the routes/web.php file.
<?php

use Illuminate\Support\Facades\Route;
use App\Http\Controllers\EchartController;
/*
|--------------------------------------------------------------------------
| Web Routes
|--------------------------------------------------------------------------
|
| Here is where you can register web routes for your application. These
| routes are loaded by the RouteServiceProvider within a group which
| contains the "web" middleware group. Now create something great!
|
*/

Route::get('/', function () {
    return view('welcome');
});

Route::get('echarts', [EchartController::class,'echart']);
After adding route, we need to create a new controller and model for the pie chart example. So, type the below command for creating a controller.
php artisan make:controller EchartController
php artisan make:model Product
Add below code in your Product Model in app\Models\Product.php file.
<?php

namespace App\Models;

use Illuminate\Database\Eloquent\Factories\HasFactory;
use Illuminate\Database\Eloquent\Model;

class Product extends Model
{
    use HasFactory;

    protected $table = 'products';
    protected $guarded = [];
}
Add below code in your app\Http\Controllers\EchartController.php file.
<?php

namespace App\Http\Controllers;
use App\Models\Product;
use Illuminate\Http\Request;

class EchartController extends Controller
{
    public function echart(Request $request)
    {
    	$Laptop = Product::where('product_type','Laptop')->get();
    	$Phone = Product::where('product_type','Phone')->get();
    	$Desktop = Product::where('product_type','Desktop')->get();
    	$laptop_count = count($Laptop);
    	$phone_count = count($Phone);
    	$desktop_count = count($Desktop);
    	return view('echart',compact('laptop_count','phone_count','desktop_count'));
    }
}
In this step, we are creating an echart.blade.php file for view.
<html>
<head>
	<meta charset="utf-8">
	<meta http-equiv="X-UA-Compatible" content="IE=edge">
	<title>How To Create Dynamic Pie Chart In Laravel 9 - Websolutionstuff</title>
	<link rel="stylesheet" href="https://maxcdn.bootstrapcdn.com/bootstrap/3.3.7/css/bootstrap.min.css">
	<link href="{{asset('assets/css/components.min.css')}}" rel="stylesheet" type="text/css">
	<script src="https://cdnjs.cloudflare.com/ajax/libs/jquery/3.6.0/jquery.min.js" crossorigin="anonymous" referrerpolicy="no-referrer"></script>
	<script src="https://cdnjs.cloudflare.com/ajax/libs/echarts/5.3.1/echarts.min.js" crossorigin="anonymous" referrerpolicy="no-referrer"></script>
</head>
<body>
<div class="col-md-12">
	<h1 class="text-center">How To Create Dynamic Pie Chart In Laravel 9 - Websolutionstuff</h1>
	<div class="col-xl-6" style="margin-top: 30px;">
		<div class="card">
			<div class="card-body">
				<div class="chart-container">
					<div class="chart has-fixed-height" id="pie_basic"></div>
				</div>
			</div>
		</div>
	</div>
</div>
</body>
</html>
<script type="text/javascript">
var pie_basic_element = document.getElementById('pie_basic');
if (pie_basic_element) {
    var pie_basic = echarts.init(pie_basic_element);
    pie_basic.setOption({
        color: [
            '#2ec7c9','#b6a2de','#5ab1ef','#ffb980','#d87a80',
            '#8d98b3','#e5cf0d','#97b552','#95706d','#dc69aa',
            '#07a2a4','#9a7fd1','#588dd5','#f5994e','#c05050',
            '#59678c','#c9ab00','#7eb00a','#6f5553','#c14089'
        ],

        textStyle: {
            fontFamily: 'Roboto, Arial, Verdana, sans-serif',
            fontSize: 13
        },

        title: {
            text: 'Pie Chart Example',
            left: 'center',
            textStyle: {
                fontSize: 17,
                fontWeight: 500
            },
            subtextStyle: {
                fontSize: 12
            }
        },

        tooltip: {
            trigger: 'item',
            backgroundColor: 'rgba(0,0,0,0.75)',
            padding: [10, 15],
            textStyle: {
                fontSize: 13,
                fontFamily: 'Roboto, sans-serif'
            },
            formatter: "{a} <br/>{b}: {c} ({d}%)"
        },

        legend: {
            orient: 'horizontal',
            bottom: '0%',
            left: 'center',
            data: ['Laptop', 'Phone','Desktop'],
            itemHeight: 8,
            itemWidth: 8
        },

        series: [{
            name: 'Product Type',
            type: 'pie',
            radius: '70%',
            center: ['50%', '50%'],
            itemStyle: {
                normal: {
                    borderWidth: 1,
                    borderColor: '#fff'
                }
            },
            data: [
                {value: {{$laptop_count}}, name: 'Laptop'},
                {value: {{$phone_count}}, name: 'Phone'},
                {value: {{$desktop_count}}, name: 'Desktop'}
            ]
        }]
    });
}
</script>
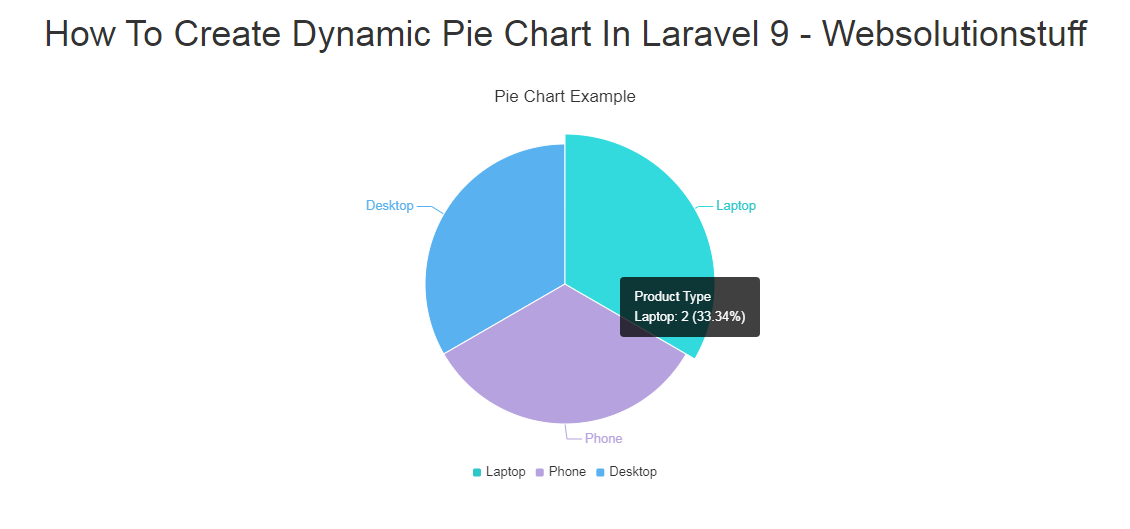
Output :

You might also like :
- Read Also: Laravel 9 AJAX CRUD Example
- Read Also: Laravel 9 Form Validation Example
- Read Also: Laravel 9 CRUD Operation Example
- Read Also: How To Send E-mail Using Queue In Laravel 9
Recommended Post
Featured Post

How to Search Comma Separated...
Today, in this post i will show you how to search comma separated values in laravel. Here, we will find specific id from...
Sep-15-2021

MilesWeb Review: Why Go for It...
For finding the right web hosting provider, you need to do a lot of research. There are hundreds of web hosting provider...
Nov-12-2021

Laravel 11 Livewire Sweetalert...
Hello, laravel web developers! In this article, we'll see how to add sweetalert in laravel 11 Livewire. In laravel 1...
May-29-2024

Laravel 9 User Role and Permis...
In this article, we will show you laravel 9 user role and permission with an example. here we will see how to set u...
Mar-02-2022